Showing posts with label My Own Designs. Show all posts

TAST 2012 - Week One - Fly Stitch

When I saw the ideas and examples Sharon had put up for the first stitch of the TAST 2012 re-run, I was immediately inspired with plenty of ideas.  I also got out my two stitch guides and found enough variations to fuel the creative process further and, soon afterwards, came up with a design plan for my first TAST sampler. I know that most of the notes didn't show up well, so I must remember to use pencil in a better contrasting shade if I want everyone to be able to read what I've written!

Like Jules (whose wonderful dandelion seed head worked in fly stitch you absolutely MUST see!), I plan to do a doodle pad type stitch sample, then try to work it up into something pictorial.  I can't promise that I'll always manage the pic, but I can try and at least got off to a good start this week.

Here's the quick test run of the stitches to make sure I'd got them sorted worked with scrap ends of no.5 pearl cottons on a piece of rather stiff 14ct Aida (that there was no chance of my using for anything 'polished').  The first few are just plain fly stitches, then a few with longer tails, then a few twisted fly stitches.  The second row shows a rather open worked fly stitch leaf (which does not work well on Aida) and then two rows of fly stitch filling.  This is done by working a row of regular fly stitches with the tops of the Vs touching, then working the next row upside down with the bottoms of the Vs joining and the securing stitch being made over the pair of touching stitches.  This filling spoke 'fence' to me.

First I painted some habotai silk to give the relevant colours to the background.  I made the mistake of putting the whole thing rather too far to the right of the hoop.  It would have been better to have been more central.  Still, I soon realised both the error and that I couldn't really do anything about it, except to ditch that piece and start again, but although I found I had more habotai than I'd feared, I'm still not up for wastage.  It was good to try silk painting again, even though I found it a fair bit harder than I'd remembered.  Need more practice, I know and having more fabric than I thought means that I can try this kind of background again soon.=)

So, here's the finished fly stitch pictorial piece.  Most of the stitches are some form of fly stitch, except some stem stitch for the foreground roses and, of course, the ribbon work (although you can work fly stitch in narrow ribbon to good effect).  The peach flowers are just straight stitches in ribbons, and the roses are spider's web roses.  Let me know if you want to know how the latter are done as they're easy, quick and effective.  The grass tufts are individual twisted fly stitches and the rose leaves are worked in closed fly stitch.


On the whole I'm happy with the piece.  The bit I'd most like to change (and could have if I'd been up for a lot of un-picking and re-stitching) would be to work the fence in a narrower gauge of thread.  I feel it's far too prominent, although the basic idea etc is OK.  Even with that, I'm pleased with this first week's work as I've been able to use fabric colouring again, I've designed something completely from scratch with little more inspiration than the stitches themselves and I worked it completely freehand - no pattern transferred to the silk.  Oh yes, and I really know fly stitch and a few variations of it quite well now!!

What's that just about the roses?  Well, of course it's a FLY!=)

© Elizabeth Braun 2012

Some needling problems

And that's not all meant as a pun.  (Which bit is, you'd best decide for yourself!)

I've had this old needlecase for a few years.  I actually made it myself when I was in primary school class 3 at the tender age of around 7, so 1978/9.  I even remember being disappointed when I went wrong on the dark green/peach line, but it was rather a complex stitch for a tiny tot to do, no?  Well, my mum used it for years and then washed it out and gave it to me when I made her a new one back in about 2005/6.


You can see how untidy it'd got inside as well.  Bits of thread hanging around, flannel insert all rusted, needles all over the place in not much order, except that most of the top right section was blunts - tapestry needles.

Whilst we were in Taiwan I worked a nice new one in a hardanger design.  I'd done an identical one in pink (which, OK, means it wasn't really identical.....) and gave it to my mother-in-law, and that after promising myself I was going to work that needlecase and NOT give it away.  I felt sorry for her as she'd had a rough time of it just previously, so I thought I'd give her the choice of colour and have the other one myself.  5 years later and it's been made up and waiting for needles for about the past 18 months.  So, last night I finally got around to populating it.

On the top left hand side we have tapestry needles in sizes 20, 22, 24, 26 and tiny 28s.  Under that come crewel/embroidery needles in sizes 10, 9, 7 (which is my preferred size - not too fiddly to work with), 5 and a couple of 3s.


Moving on to the right hand side and, from the top, three beading needles, 4 straw/milliners ones in sizes 3, 5, 7 and 9, then two other large needles that I don't really know what to call, followed by chenilles in sizes 18, 20, 22 and 24, then a few general sharps for sewing.

So, now I just have to get used to the sight of my new needlecase.  At least it's still green!

I've been thinking about the berries design and the problems associated with it.  First of all, the silk (backed with interfacing) feels very stiff and rather like paper.  Not nice to work on.  And, as I had it out of the frame for a while, there are nasty buckles in it, which just won't do.  You can see a bit of how it's got spoiled here.

Also, to be honest, I'm not that pleased with the design.  It's all over the place with no real sense of balance and I just can't find any enthusiasm to work it.  I started on the monogram a few weeks ago but, as the letters are half the dimensions of the ones I took the design from (Susan O'Connor's book), they really are too small to do properly and, when I tried, they just looked so scrappy that I would have done better when I was seven!  If not, then at least there would have been that as an excuse.  So, with all that in mind and the fact that silk on silk was really not at all practical for an everyday manicure set, (I mean, we're talking about a normal, modern woman here, not Lady Mary Crawley!!), I decided to take the piece out of the frame and take the whole thing back to the drawing board.  Perhaps a larger monogram with the berries around it??  I'll see what I can come up with.

In the meantime, I went through my kit box and fished these two out.


I could wish that, when kit makers were putting these things together, they'd spare some thought on how well the colours in the design go with the fabric they provide.  It always seems to be a cream colour that gets used (and the piece in the Brazilian kits is rather rough and rigid as well), but it seems to me that these purple roses and the light, blue-ish greens that are with them would be much better suited to white.  I laid the threads against three fabrics for comparison.  The first from the left is white (cool), then an antique white (neutral) piece, then the cream (warm) from the kit.  I know it doesn't show up as well as it could here (the original fabric is a bit yellower in reality), but the cool shades match the white so much better.  Colour is very important to me and I can't feel comfy with 'it looks OK' when it can look better!  Perfectionist?  Well, perhaps.  In some things anyway.  A pass grade won't do for me when a distinction is available.;)

I haven't started either yet, and I also want to have a go at a berry or two, so I can't say for sure what's coming next, but something will.  Soon....

© Elizabeth Braun 2011

Goldwork viola

And I managed the strings! I didn't think they'd ever work out, but I ended up putting two rows of bright check purls over a small piece of felt to give enough height for the strings to both catch on the bridge and get over the bottom part of the finger board. If you don't look at that part too closely, it's OK!!
The background is now totally done on the narrowboat piece, but as it's not much different from last time, it's not really worth a new picture yet. Hope to show more of that later in the week.

In the meantime, I'm enjoying the sense of accomplishment that came from having finally completed that viola. I started it in Taiwan back in mid February 2010, so it's taken 20 months to get it from re-working the design to completing the stitching! I hope I don't have too many more projects that progress so shakily...


© Elizabeth Braun 2011

Chinese Wedding Card

Just a quick post today to show a card I made over the weekend for a Chinese couple I was asked to stand witness for at their legal wedding ceremony yesterday, (if you can follow that!!) Red is the Chinese colour for celebrations and they often trim that red up with gold, so I mixed that colour scheme with our traditional white for weddings and did a quick hardanger piece.


DH typed up and printed out a nice something in Chinese which he stuck on the inside as a flysheet sort of arrangement too so, for an impromptu piece, we were quite proud of it.=)

Here is the final card mounting of the heart I did recently as well. This was for a silver wedding anniversary, but I found that I didn't actually have a silver '25' sticker, so just left the front plain. I think the stitchery is fancy enough anyway.


Next thing I hope to do it to get the water violets and fish piece made up into the final cushion/pillow cover. No estimates on when yet except that it must be done by 7 July.

5 Smalls, 3 Styles

Here are all my other recent finishes, most of which were worked on whilst I was working in Leeds recently.

The first is a cross stitched bookmark made for an elderly friend of ours, Charlie. He was delighted with it when we gave it to him last night.=)


Next we have the two printed canvas needlepoint kits that my mum found a few months before we went to Taiwan (about two years ago now!) and that I recently finished off and 'repaired'. On looking at the top one again the other day, I realised that there are more repairs to make, i.e. when I decided, in my 11 year old wisdom, that it wouldn't matter if one or two stitches went \ when all the others were / as it filled in the shape better....


Here's a wedding card done well in advance of the big day on 20 August this year. Now like me to get things done in good time (Prince Albert would have approved: 'It's always better to complete a task well ahead of schedule.'), so I now have this to keep clean and safe (in its envelope) for the next 2 months and to think of a gift to make.


The last photo shows the circular card mount I chose to put the silver and purple heart in. I took pix of both this and in a square mount and, as soon as I could see them side by side in my photo package, there was no contest on which looked best. (I'll post a better photo when I've taken one.)


Next task is to get on with the blackberries and make up the two cushion/pillow covers etc, but I'm rather busy preparing for software and secretarial exams (plus going to classes and so on) just now, so I mayn't get on as quickly as I'd like... So what's new, huh?!

A design's not final 'til the stitching's finished!

This was the design I initially created for friends' Silver Wedding (25th) anniversary card, to be worked in silver goldwork threads and Anchor Marlitt:


The changes started when I went to my LNS only to find that, although they stocked plenty of gold goldwork threads, their supply of silver was very low indeed. I wasn't able to get pearl purl and so had to adapt straight away to twist instead. I managed to get the silver kid leather, but when I tried to cut it out into the inner heart shape, the result was so creased and, frankly, cheap and nasty looking that I couldn't bear to use it. So, that bit got dumped too and I decided to move the trellis from over the purples, to filling the inner (now middle) heart. The tiny heart in the centre was to be filled with silver bright check purl.


However.... I noticed that the silver of the bright check was not as cool as the rest of the silver threads. In fact, it was relatively yellow. That bothered me, so I ditched that idea and decided to fill in the space with French knots in DMC metallic floss.


Above you can see the first stage of the purple shading completed and the second layer underway. The top right hand side ended up so un-even that, when I'd done the lot, I realised that, not only would I have to outline the inside of that section with Kreinik Fine Braid, but that I needed a line of it between the two purples as you can see below:


By this time I'd also decided that I wasn't going to fussing around adding in accents in pink Marlitt either!!

So, much changed from the original design, here is the finished item. It's a little puckered, sadly, but that came from my not getting the silk fabric totally flat on the backing cotton when I was sewing them together - a problem I've had before.=(


And here's a side view. Of course, it isn't possible from this angle for my camera to focus everything perfectly (so I had to cut the bottom section off!!), so the right hand side is a tad blurred, but I hope you like the effect all the same. All that remains now is to decide whether to mount it in a round or square aperture card.


So, although I haven't blogged my work for a fair few weeks, I have been stitching! This isn't all I've been doing either, there's more. I'll post about that in the days to come.

Designing a manicure set pouch

About five years ago, when my second sister announced her decision to (finally) stop biting her nails, I promised her that, when she cracked it, I would buy her a nice manicure set as a reward (and to fill a new need!!). I confess that it slipped my mind at the time and when I did remember (long after she no doubt forgot - she doesn't have my elephantine memory, lucky girl!!) all I could find on the market were trendy teenage designs that I frankly wouldn't insult her with. So, I realised I was going to have to make one myself. I bought all the things I planned to put in it - scissors, emery boards, tweezers etc, and did a design.

OK, so the project went no further. Problem I think was that, unless there's a discernible deadline, things rarely happen with me, so it got kind of unintentionally shelved and the manicure tools hujng around on my bedroom shelf for a long time. Well, she gets married out in Taiwan next month and alongside the 'blue cushion cover' we agreed on as her wedding gift, I decided it was high time that this other one was made and it's a great occasion to give her a personal something. Naturally, now the time is finally upon me to do the project, I can't find the manicure stuff!! I've seen them since we moved and I put them somewhere just too safe!!

I looked at the design I drew back in '05 or '06 for the pouch and decided that it was cluttered and just wouldn't work after all, so set out to rework it yesterday afternoon. When I went with Rosie to a stitching and craft show once, she'd admired the stumpwork blackberries on display in one retailer's booth and said, 'They look good enough to eat!' So, I there and then decided to do some for her at some point. Marrying the two ideas, we get the following design process.

I don't go for drawing things out and then re-doing it until I like the layout, so instead I drew a box the correct size and cut out a few berries, leaves and a flower (yes, I know blackberry flowers are long gone before the berries ripen, but this is only art...) and played around with them until I had an arrangement I liked.


The next stage is to draw out the best layout and colour it in (got a chance to use the yummy Derwent Coloursoft pencils I treated myself to on my last full day in Taiwan). This is basically what I'll be stitching, only the flower will be moved to the right a little so as to be at the end of the stem and thus look more realistic. I consulted my 'British Wildlife' book quite a lot during this design!!


This is the floss toss showing the Madeira silks I plan to use, the beads for the fruit and 2 options of lining material. Now the pink looks a bit nicer with the antique white silk - just matches better, but I know Rose likes green more, so I won't decide on that one yet, but will see how it looks when the embroidery is done.

I've cut and washed the silk fabric (which I think shrank a bit!) and I just need to check with Rose that she will take her hubby's name before I put her future initials on the back. I can't see her not taking it, but you just can't be sure, so better safe than wasting time on a 'G' when an 'E' was required.=)

Stitching due to start over the weekend, all being well!

Last C&G Sample and Colour Display

This is the last of the Samples Project I'm able to share with you. Today was the last working day at College and I really only went to prepare my display, which took most of the day to mount!! This sample was meant to be of manipulated fabric techniques, but I confess, I didn't finish it and get to that part. I've posted this one before to some degree, but here it is in the full line up. The sources were a sapling opposite our flats and a bird table I found on-line. Here we have a pastel picture of the two together, then a collage using painted papers etc, and then the sample which is worked in over-dyed threads (yes, GAST and WDW) on a fabric painted background. A bit lurid and makes it look springlike when it's meant to be autumnal, but it could be worse!!


Below is the Colour Module display that I've done for the College end of year exhibition next week. The photo was awful as my new camera just won't take indoor pix without blurring them horribly. I couldn't manage with the old one - having to hold the battery door shut - in the middle of the studio etc. DH is getting me a lovely new one that will take pictures in dim light and all sorts - great for museum collections where photography is sometimes allowed, but lights are low and flashes a no-go. I just got this pic to show it all together. I think I'll try and take a better one when I bring it home and can use the old camera on it, but you can see how I put in white mounts for most pieces and also used some other colours of card and paper to tone in with the artwork and samples etc. Do you think it works?


So, that's it for City & Guilds for me for the foreseeable future. I'm not sure if I'll go back after our year away and re-start as the whole programme is changing and, whilst it seems somewhat less work and not too bad, I just don't know. We'll see.

Now that's out of the way, I can get back to some of my 'regular' stitching. =)

Coloured Broderie Anglaise Sample

One more sample done.=) Sadly, I can't find the source image at the moment as my laptop has died (we think the motherboard has gone - RIP Laptop!) and it's on there rather than the PC I'm posting from right now. Once I can get at the laptop's hard-drive to take my files, contacts and bookmarks off, I can add it in here, but for now I'll have to just present the pastel painting of the source photo, which doesn't look too much different from the real thing, and the stitched sample. This time we have a broderie anglaise piece worked in colour (as opposed to the traditional white on white) and on a piece of fabric that I dyed back in Decemeber.


Here also are a drawing and a collage of Haddon Hall in Derbyshire, UK, where Zeferelli's 'Jane Eyre' was filmed and which also appeared in the 2005 film version of 'Pride and Prejudice'. This was work for the first sample in the 'Texture' module, although I got no further than a total of 3 pieces of art for that!


Neither are spectacular, but the shapes are generally OK. I think the drawing is really lacking depth of colour in the main - the walls are too insipid, but I seem a bit short of serviceable grey shades of pencil, other than standard graphite. Art materials are one of the many things that are cheaper in Taiwan, so I'll stock up a bit there - and probably get a new laptop there as well.

Before my laptop did totally die (after 2 'sick' periods), I was able to do some pruning on my blog and deleted over 80 posts that were really saying nothing and editted probably as many. So, about 30% of it has now gone, which should make finding stuff and reading back for new visitors that much easier.

More art and stitching photos to come soon as I have also been working on the autumn tree sample and have taken photos of some other design/artwork that I've been doing for the C&G and will post that in spates with stitching WIPs.

IDIOT! (Lots of photos)

I can't believe I did this, but I actually managed to irretrievably delete 2 old posts whilst trying to change the labels on them! Thankfully, I have some idea what they were about, so I'm going to re-hash them here so as not to lose the record.

The first is the first sample from my C&G Colour module, which was a flower border. Here it is from source image, through rubbishy gouache painting (first time using this kind of watercolour) to finished piece of stitchery:


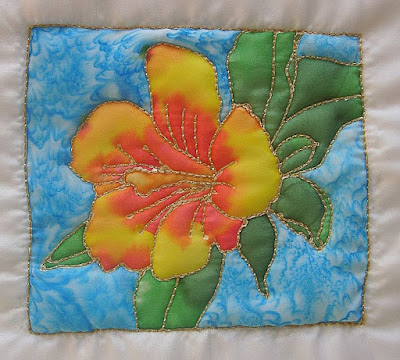
Second was my silk-painted, 'quilted' hibiscus sample (#8 for my C&G) and here's the photo collection from source image, through artwork to finished sample.


I was going to add in some artwork from a previous resolved piece, but I can't get the image to move. I may well have over-done the amount of images allowed per post, so that'll have to wait until next time. I will now add the correct labels and try, in future, not to do such dumb things again! Duhhhh!

I went through my kits yesterday and started to plan which to take with me East this summer. Some of them will get packaging dumped and instructions scanned/re-typed and designs transferred etc first - anything to keep the weight down! 20kg of stuff, plus 7kg (and a laptop) cabin baggage is not much for a year! Glad EVA allow you to take a laptop as a separate piece of hand luggage, although it might be a challenge getting that through the airports, which are strictly one piece in the UK. We'll think of something.=) Yes, Von, I agree that this could well be the reason no job came up. I was rather thinking that myself....

Frustration!

Oooof! I feel really fed up with my art and stitching stuff right now. Well, the C&G part of it anyway. I don't seem to feel comfy doing any other when there's outstanding C&G work and I am just so horribly behind at the moment, that I feel overwhelmed with it. I've lost most of this year so far to winter bugs etc and have been to college only once this half term - next week is the mid-term break! I'm also really fed up that the course just charges through so bloomin' many techniques and so on. I'm certain not even half of them - esp. the art side of things - are required by the syllabus and I feel dangerously close to quitting altogether.=( I need a good talk with the teacher tomorrow. In the initial stages, I was planning on fast-tracking and doing it all in 1 year, but things have gone anything but according to plan, I'm easily the farthest behind in the class and feel really embarrassed about it.

Lots of college work done

Spent much of yesterday and some of the evening before getting well on with my C&G work. It's often just 'getting around to it' that's the problem here. Yes, like someone commented, some of the stuff isn't to my taste, but I just bear in mind that I'm learning techniques that I can apply to things I do like in the future. I don't really count much of the C&G stuff as stitching, so to speak, it's just college work!! Stitching is the projects I choose to do!! Yes, I have been known to get sick of gifts as well, although I never make and give something I personally don't like. I can be quite particular about designs, (although I find that less now that I've moved away somewhat from the cross-stich world, with all its holiday and patriotic designs that all leave me cold), but I do like a lot of things and can always find something nice to do for someone. If not, I can design it!=)

Anyway, here's what I did all clumped together in one photo for the time being as no one piece has been completed. There's work on 3 samples/designs here - artwork for all of them (I did one drawing, which isn't finished yet - I want add more detail and make it more 'mature', one pastel picture and 2 collages, although one of these has as much gouache painting as anything!! And I spilled my dirty painting water all over it....) and fabric preparation for 2 - one painted and one bonded. Both of these came out a bit brighter than I really wanted, but it's supposed to be a learning process, so I don't mind that much. I'm more concerned about getting the dratted stuff done, to be honest!

Post Zusammenfassung in Deutsch:

Gestern und vorgestern habe ich viele Arbeit für mein City & Guilds Stickereikurs gemacht. Nichts ist jetzt fertig, aber ich habe der Design und Kunst für 3 Sache fertig gemacht und der Stoff für 2 vorbereitet. Ein ist gemahlt and ein zusammen geklebt.

Ich studiere diesen Kurs bei Harrogate College (eine Berufschule). Es macht mir viel Spass, aber manchmal gefällt es mir nicht so was wir tun muss - zu modern für mich. Ich hab' tradionelle Stickerei am liebsten und fühle oft, dass ich sticken muss was ich nicht besonders mag. Tja, so ist es eben! Ich lerne viele neue Sache die ich später für etwas schöner nutzen kann.=)

中文:

我昨天和前天作了很多学院的事。这种事算是‘功课’吗?=)我读的是刺绣课程。挺喜欢,可是有时候太现代式。我更喜欢的是比较漂亮的东西。

这张照片是最近作的艺术事(设计部分)和准备快要绣的布。

我昨天和前天作了很多學院的事。這種事算是‘功課’嗎?=)我讀的是刺繡課程。挺喜歡,可是有時候太現代式。我更喜歡的是比較漂亮的東西。

這張照片是最近作的藝術事(設計部分)和準備快要繡的布。

Cut-back appliqué sample done

I actually did this sample on Friday night, but had no chance to take a picture in daylight until this morning. I've had a busy weekend, but a very encouraging one and, even though I feel rather under the weather (a bit buggy and very tired), I've made a few important decisions and that feels good!=) I really must get up to date with my C&G work though.... Decided not to apply for the job I was interested in as I'm still very run-down following the burn-out type episode in autumn 2007 and a very demanding 2008, and that I'm not going to use up my precious energy on work when I need it to get better and to devote to more important things.=) I also want to have time and umph for my hobbies and interests instead of just getting in feeling fit to drop.
Anyway, you've seen the acrylic painting I did (2 posts ago) which was prep/design for this sample and here is the photo it came from:

And here's the finished sample, which was stitched with machine rayon thread (yes, on the machine, which was an interesting experience as the feed dogs won't drop, but I found I could move around freely anyway with the darning foot on!!), then cut back to the relevant layer to get the right colour. The green layer is one of the pieces of fabric I dyed a few weeks ago.


Hope to be able to be able to get on with the manipulated techniques sample this week, but I have quite a lot of domestic things to catch up with, so no promises! Haven't done any more on the goldfinches yet, but I might well do over the next couple of days.

I was asked about my music. Well, I haven't really touched my poor viola recently! In fact, I've palyed her about twice in the last month and one of those times was my lesson! The other I did a few scales and exercises and nothing more. I did cut my nails this morning though, so I hope to get some prac in later today. In my last lessons, we did get to the end of Book 2 at last, so I hope to be moving on to Book 3 this year and getting both it and Book 4 under my belt.=) My playing is a lot smoother than it was at the beginning of last year and pieces that looked really hard to me then are now much less challenging. I haven't made great strides, but I have progressed and enjoy it, and that's what matters most.=)

Backwards, forwards and right here and now!

Oof, another year all but gone - one and a bit more days and it's 2009 already! DH asked me what I thought of the year last night and, whilst I won't go into most of what we talked about here (not 'on-topic'!), I did mention that I felt I'd hardly produced any proper stitching this year! 'Tis too true!=( All I've done is 5 things (2 very small), plus finished off one left over from last year and made up a cushion/pillow cover also left over from last year and got 2 counted thread pieces in progress, (<- here's the current status on the Goldfinches BTW). That's not counting my City & Guilds samples, of course, but I don't really count them that much as normal stitching, but as college work.

So, in detail, what did I do?

Finishing from 2007:

* Finished off 'Bluetits and Seedheads' cross stitch (see here)
* Made up 'Child of Spring' cushion/pillow (photo here)

New in 2008:

* 'Branches of Your Life' card (finish pic here). I did a couple of tiny bits on this in 2007, but it was mostly an '08 project.
* 'Rose Arch' ribbon work, finished into a thank-you card (view here unmounted)
* A simple goldwork dragonfly, (see here), which I still haven't used for anything and is rather too big for a card.
* Helen M Stevens' 'Ornamental Pool' piece (link here)
* Hardanger 'Flowers and Leaves' cushion/pillow (pic here before making up)
* 8 City & Guilds samples

Started this year, but still unfinished:

* 'Goldfinches and Thistles' cross stitch (see above for photo)
* 'Silver Frost' band sampler design (see 2 posts ago for latest WIP pic)
* 2 or 3 more City & Guilds samples (plus more not even started yet...)

Plans for 2009 stitching wise are:

* Finish all WIPs, including C&G stuff
* Get my C&G work done in time, (mid-May for this year's work)
* Do a hardanger cushion for my Taiwanese friend
* Stitch something for my 2nd sister before she goes abroad for a year, preferably something with practical use.
* Take several kits with me when we go back to Taiwan in late August/early September, should all go according to plan, that is!!!
* DH's 10th anniversary card - probably a CQ heart.
* Do some small pieces that I want to do. No more obligation stitching!


Here's my first ever acrylic painting that I had to do as part of the eternal C&G work. I can't say that I'm over-enamoured of it, but it'll do as a first time with the paints and the colours worked out OK. The edges of the colour variations within the petals are nothing short of awful, but, as with most art courses, you get given a subject and a medium and just told to get on with it, you don't get any instruction on how to use that medium! I've now borrowed a book from Leeds City Art Library on acrylics for beginners, so I have an idea how colours can be worked together. I would say that, in the main, I enjoy the course, but I still rather wish I hadn't started it (I knew this would happen.....) as it's just so much work and I feel quite bogged down with it at the mo. I just don't seem able to keep up well at all, even though many of the others do. There's at least one who struggles more than me to keep up, so I'm not the furthest behind, or wasn't at last count anyway!!! Anyway, here's the current state of the stitched piece this will be. It's to be cut-back appliqué, so here are 4 layers of fabric tacked together and waiting to be machine stitched. You can just see the blue markings on it if you look closely. I'm rather nervous of my machine though as it goes so fast....

More soon, I hope!=)